To measure yourself for clothes, first read the retailer’s definition of each dimension. Then use a flexible tape, relaxed posture and consistent units. Keep body measurements separate from measurements of an existing garment; the same number can mean something different in those two systems.
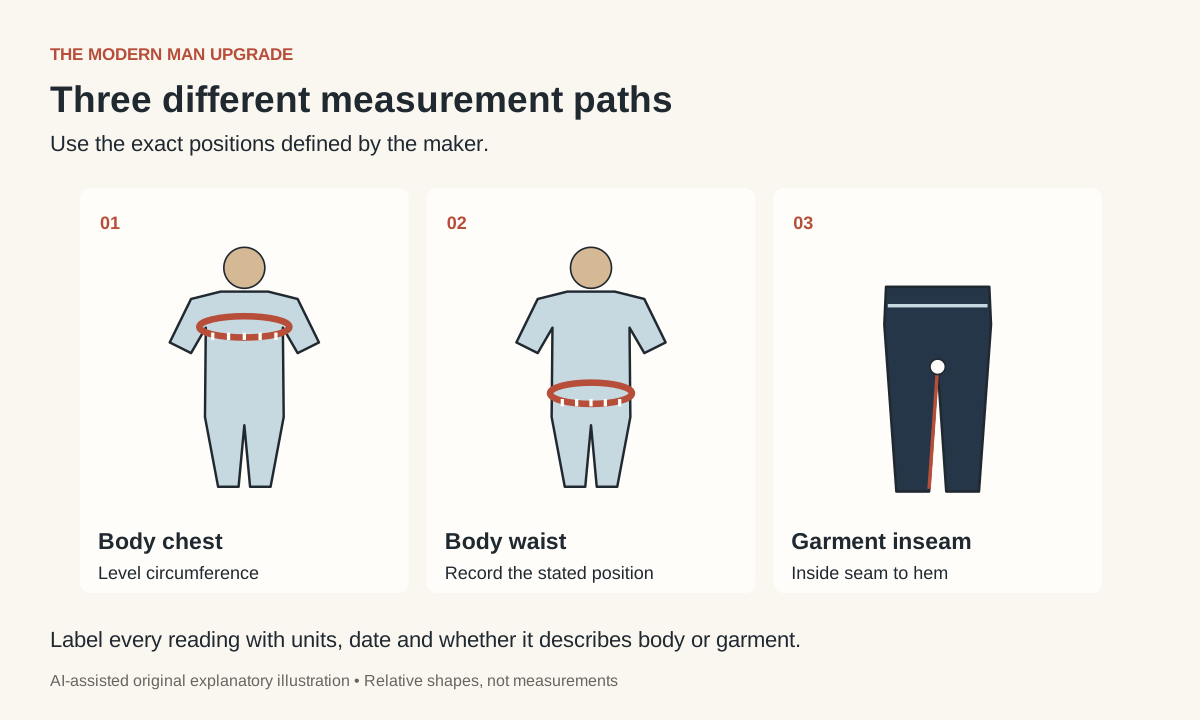
Record whether the chart asks for body circumference or garment dimensions. Measure chest and waist at the positions shown by that maker, repeat the readings, and label the units. For an inseam comparison, measure a suitable pair along its inside leg from crotch seam to hem. Use the numbers to narrow choices, then check fit in movement.
Read the size chart before taking numbers
Find the measuring instructions on the product page, not just the letter-size table. Does “chest” mean your body around the chest, or the finished shirt measured flat? Does “waist” mean a body position or the waistband of the trousers? If the page is ambiguous, ask the seller before using a number to choose a size.
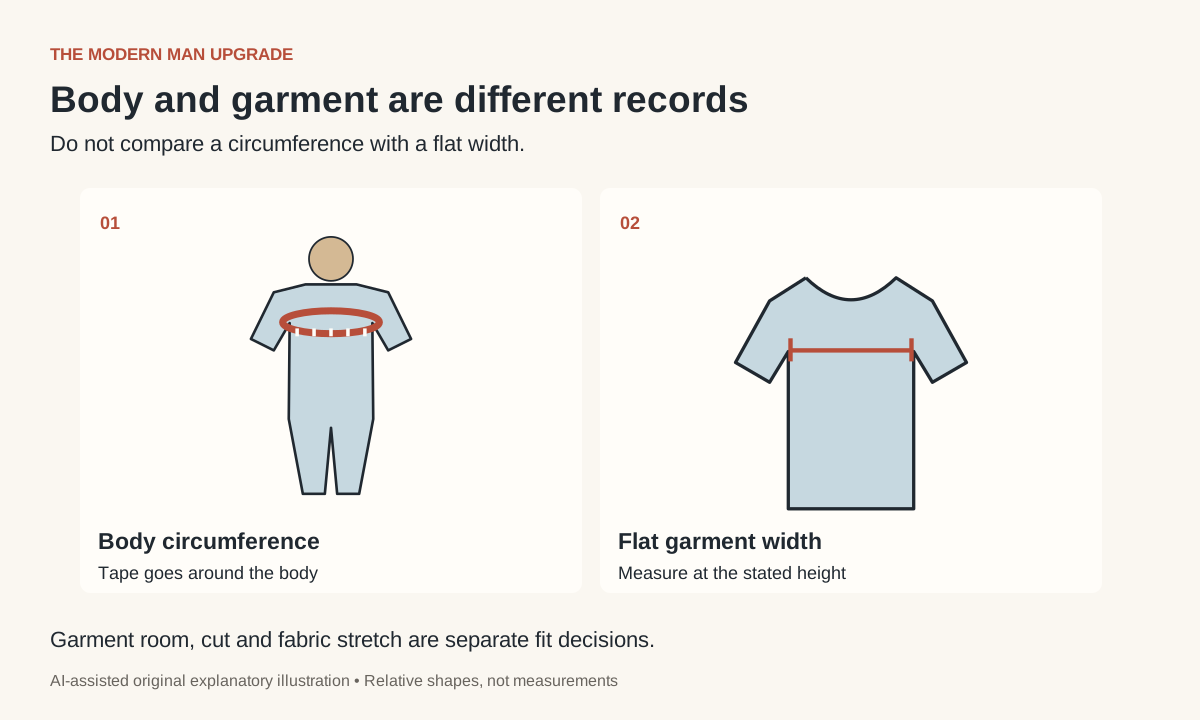
Proper Cloth's body-versus-shirt explanation makes this distinction explicit: several stored shirt measurements are flat widths rather than body circumferences. Doubling a flat width can describe a garment's approximate circumference in that method. It does not make the result your body measurement or tell you the right amount of room.
Check centimeters versus inches and any regional sizing system. Copy the relevant chart headings into your notes. A number labeled only “waist 34” leaves too much uncertainty: it might be a tagged size, body circumference or garment dimension.
Prepare a flexible tape and a simple record
Use a flexible measuring tape with readable markings. For body measurements, wear thin clothing as directed by the maker, or measure without bulky layers. Stand naturally instead of flexing, pulling your stomach in or expanding your chest. A helper can make it easier to keep the tape level behind you.
Record the date, units, measurement name and exact method. A useful note might read “body chest, level around fullest chest, centimeters, retailer method.” For trousers, add the product and wearing height when relevant. Do not mix a tailor's instruction with another retailer's chart simply because both use the word waist.
Take each reading again after resetting the tape. If the readings differ noticeably, check tape position and tension before averaging them. The goal is a repeatable method, not a flattering number. Avoid squeezing the tape into the skin or leaving a large unsupported gap unless the specific instruction asks for it.
Measure chest and waist at the defined positions
Chest circumference
Pass the tape around the chest at the position the chart specifies, commonly the fullest part. Keep it level and let your arms return to a natural position for the reading. Breathe normally. Proper Cloth's chest demonstration shows its own body-measurement method with the tape around the chest rather than across the front alone.
Check the back in a mirror or ask a helper to check it. A tape that rises at the back follows a different path, even when the front appears correct. Repeat after repositioning it and record the method with the number.
Waist or midsection circumference
Follow the maker's stated location. Proper Cloth's shirt waist measurement uses a relaxed body midsection method. That is not automatically the same point as the waistband of your lower-rise jeans or the natural waist used in another chart.
Mark the position in your notes: for example, the retailer's illustrated midsection point or the actual wearing height for a specified trouser measurement. Keep posture and tape tension consistent. If the chart requires more measurements, such as seat or neck, use its corresponding demonstration rather than inventing a substitute.
Compare an existing garment when the chart uses garment dimensions
Choose an item that already fits the way you want in the relevant area. A stretched, damaged or poorly fitting pair is a weak reference. Lay it on a flat surface and follow the retailer's instructions for fastening, smoothing and measuring. Do not stretch the fabric just to make it reach a desired number.
For a trouser inseam comparison, expose the inside leg and measure along the seam from the crotch junction to the hem. Proper Cloth's inseam tutorial illustrates this garment method. Write “garment inseam” beside the result, and note which pair you measured.
For shirt chest width, use the exact measuring height and flat method stated by the maker. Shoulder and sleeve instructions deserve the same attention: sleeve length can start at a shoulder seam or follow a different path from the center back. Those values are not interchangeable. The full shirt body-measurement guide is one example of a defined system.
Use numbers to compare, then test the actual fit
Make two separate lists: body measurements and reference-garment dimensions. Compare the appropriate list with the product chart. Do not subtract your chest measurement from a flat shirt width, and do not apply one fixed amount of extra room to every garment. Fabric stretch, cut and intended layering change the result.
If you are between sizes, read the maker's advice, examine the relevant fit dimensions and check the return or alteration options. A bigger waist may also change seat and thigh room. A tagged size that looks familiar is not a guarantee that the cut matches your existing pair.
Once the garment arrives, check it standing, sitting, reaching and walking. Numbers help narrow the search; they do not replace comfort and movement. Use the clothing fit guide for those checks and the suit buying guide when tailoring and alteration limits matter.
Measurement questions
Why does my measured waist differ from my jeans tag?
A tag is a size designation, and charts differ. You may also be measuring a body position rather than the finished waistband. Check definitions before treating the difference as an error.
Can I measure everything alone?
Some dimensions are easier alone than others. A helper is useful for keeping a body tape level and following longer sleeve paths accurately.
How often should I update the record?
Remeasure when fit changes or before a purchase that needs accurate dimensions. Keep dates so an older record does not silently replace a current check.
Use the free Top 3 filter to prioritize a confirmed fit problem. One careful measurement and comparison can be more useful than replacing several garments by guesswork.